Sunday, June 15, 2008

Cleanin' Off The Dust

I bought a Quickutz ages ago...and I haven't used it much since. I really need to make some time to play with it....and just see what I can make. In an effort to do that, I recently completed the following scrapbooking layout (in case you are wondering...it was part of a gift album...that's why I am making Christmas layouts in June!).

I needed a two page layout, and I only had one photo to work with. The layout was an 8x8, and the size was ideal for using my Quickutz to fill in some of the gaps. One page of my layout features the photo, and the second page features some of my Quickutz fancy work. :)

On this page I used silver cardstock and Christmas paper from SEI. I used a snowman die, a snowflake die and a Santa die. They were mounted on red and then green cardstock and I used my corner rounder to soften all of the corners. The wide red grosgrain ribbon that covers the seam in the middle is from Michaels. White brads make up the centers of the snowflakes.

The other page also features Christmas paper from SEI. Once again I used red and green cardstock for matting and my corner rounder for continuity with the other page of the layout. A snowflake and wide red grosgrain ribbon are the common elements that tie the two pages together.


Lastly, a white gel pen was used to write the date above the top right corner of the photo.

Thanks for stopping by today!

Wednesday, June 11, 2008

Fly

When I worked on my school bus layout for my Prettie Wednesday post last week, I was already thinking about my layout for this week in the recesses of my mind. I worked through it in my mind as the week progressed and then the time to execute was upon me! How does that always happen so quickly?!


This layout features my husband and daughter playing at the beach last summer. My husband was throwing her up in the air and catching her, and I captured the different stages of the game with my camera.


The papers are all from a Close To My Heart paper packet called Discovery. I LOVE this paper. It is one of those special things that I have been hoarding for quite some time now. It seemed too pretty to cut!


The stamp is from Paper Pretties....of course! It is Flutter By Sophia. Her caption of "Flutter your wings and fly" is what gave me the idea for this layout. She is just adorable...perfect for use on a page about my adorable daughter! :)


I also used two other stamp sets.....both from CTMH. The first is called Fluttering Love and the second is called Boutique Alphabet. The alphabet stamps were used for the title "FLY". It was stamped in CTMH ink called Hollyhock, and then the letters were cut out by hand and a dash of Dazzling Diamonds was added to each letter. The Fluttering Love stamp set was used for the butterflies you see throughout the layout. Sophia is holding one in her hand and they are also scattered on some of the photos. The butterflies were stamped in Hollyhock ink also, and then they were cut out by hand. My Atyou Spica pen was used to add some sparkle to the butterfly wings, but you may not be able to see it in the photos.


I used a Fiskars arrow punch to punch two arrows that help to draw attention to certain elements of the layout that I wanted to highlight.


Sophia was mounted on the layout using a large, white brad so that her image can rotate to the side to reveal journaling about the photos and the day they were taken (the journaling still has to be added!) in behind.


Yes, this photo is an upside down photo of my layout. I wanted to show how the butterfly in Sophia's hand is layered up to give the effect of dimension. Sophia is actually holding three butterflies! The other butterflies on the layout are all individual butterflies that have had their wings popped up with dimensionals.


The last thing on the agenda for today is announce the winner of the blog candy!! Drumroll please.......

The winner is number one!! Cindy Vernon. :) Cindy, please email me your snail mail address to creativeexpressionspapercrafting@yahoo.com.

Thanks for stopping by today!

Tuesday, June 10, 2008

Musicabella

I recently had a friend who asked me to make a card for an occupational therapist. She wanted the card to be musical and/or artsy in nature. Since I had just gotten my new Bellas, it was a no brainer as to what stamp I would use.

I inked up my Musicabella with brown StazOn and off to work I went! I used my Coluzzle blade and oval template to cut out my little Bella and then I trimmed up the oval mat by hand. Bella was coloured using water colour crayons and an aqua painter. The ribbon is from Michael's (or maybe Joann's....yeah...I think this one was from Joann's).

I can't tell you where this patterned paper is from....it was from my scrap bin and I swear it is as old as the craters on the moon. The card base and the mat for Bella are simple brown cardstock. The sentiment is from MFT's Essential Sentiments set.

Stay tuned...the blog candy winner will be announced tomorrow!

Thanks for stopping by today!

Monday, June 9, 2008

She's All That Times Three

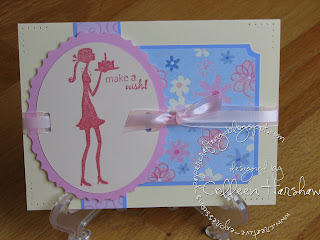
I purchased this cute stamp set from SU! and it sat without being used for far too long! I finally decided to correct that! I made three different variations of this card...all with the same paper, ribbon and stamp, but with subtle differences in how they were assembled.

The stamp set is She's All That. The ink is from CTMH....it is called 'Blush'. I used decorative edged scissors to cut out mats for the main image on all three cards.

In this first sample I messed up the mat so many times while cutting that it ended up being cropped very close to the image! I cut the image out with my Coluzzle knife and oval template, and then used the oval template to cut out the mat in one size larger. Once I had the larger size oval, I used the decorative edged scissors to cut around the mat to get the fancy edge. I then pierced along the top and bottom of the card. I used my SU! punch to punch the slits in the image oval and then I threaded the ribbon through and tied it in a bow. The papers are from.... who am I kidding...I have no idea! The ribbon is from Michael's....isn't it pretty?!

On this version I used my corner rounder and skipped the piercing. A couple of cute pink brads on the bottom corner (Making Memories) and it was done!


On this version I used my ticket corner punch from SU! and pierced on all four corners. The rest is the same.

So, what do you think? Which one do you like the best?
Oh, and don't forget there's one more day to leave a comment and have a chance to win the blog candy! Just scroll back a couple of posts. The winner will be announced on Tuesday or Wednesday of this week!
Thanks for stopping by today!

Thursday, June 5, 2008

Family Man

A friend of mine needed a Father's Day card recently. The description that I was given was that he is an engineer and a family man. Since I don't own an engineering Fella, I opted to go with the Grillafella....grilling, family, fun....they all kind of go together, right?


First I stamped my Fella in StazOn, and then I coloured him with coloured pencils and blended him with OMS. I stitched the stamped image onto a navy blue cardstock with my sewing machine. The plaid patterned paper was from my scrap bin....and I can't remember where it originally came from. The wide maroon grosgrain is value ribbon from Michael's The sentiment stamp is from the SU! Circle of Friendship stamp set. The tab was made with a tab punch and the 'dad' was spelled out with Alphabitties stickers.


The buttons are random buttons that I found in my Mom's old sewing stuff. If I know my mother, they probably came from my grandmother's house 40 years ago. So I can't confirm their origin! LOL

And, here is a close up of my little Grillafella.

Thanks for stopping by today, and make sure to scroll back a couple of posts and leave me a comment in order to have a chance to win some blog candy!!


Wednesday, June 4, 2008

Waiting For The Bus

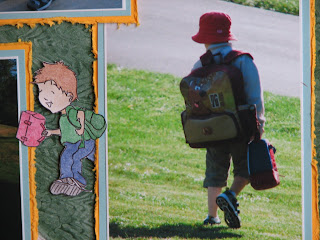
For my post this week I decided to make a scrapbook page for my son's album using Back To School Sophia and Cooper from Look Out World. Look Out World can be purchased from Paper Pretties, but in order to get your hands on the likes of Back to School Sophia, you will have to join the Paper Pretties Stamp of the Month Club! Your membership includes a new stamp each month, and little Sophia was the stamp for the month of June. Isn't she cute?! For details on the club, just go here.

The background for this page is white cardstock. I started out by sketching the road and sidewalk in pencil. I then used green acrylic paint and a paint comb from my Making Memories Distressing Kit to create the grass. The sidewalk was coloured using Crayola coloured pencils and then blended with OMS and a blending stump. The road was done with pencil first, but when it didn't blend as I wanted, I went over it with a sponge dauber and stone grey StazOn.

For the kids heading to the bus, I stamped two Coopers and one Sophia...masking them in between. I used black StazOn to stamp them and then Crayola pencils to colour them and OMS to blend them. I cut them out by hand with small Fiskars scissors and a Coluzzle craft knife.

For this version of Cooper, peeking out from behind my son's photo, I used a light table and traced him in black pen so that I could get a reverse image. He was coloured using the same technique as the other kids.

Each of the photos were double matted. The largest mat for each photo was distressed using a v-blade from my MM Distressing Kit. The journaling was written on a DCWV tag and then tucked behind one of the photos. It slides in and out to reveal the story behind the photos. Both the title and the school bus are Jolee's. One is from the Jolee's By You line and the other is from Jolee's Boutique.

Thanks for stopping by today, and don't forget to leave a comment on my previous post in order to have a chance to win an extra large oval Fiskars punch!

Tuesday, June 3, 2008

Blog Candy, Anyone?!

So, we finally made it home from Canada! Twelve hours in the car with two children does not make for a happy mommy. Phew... But, we are back, and all in one piece!

I thought that I would like to celebrate my return to my home (and to my stamp room) with my very first blog candy! Anyone who has been here knows that this blog is quite new, and therefore I haven't had the chance to join in the fun of giving stuff away...yet!

For my first blog candy, I have an extra large oval squeeze punch by Fiskars. There is actually a story behind this punch. I bought one a while back, and it broke after I used it only two times.
I called Fiskars customer service to complain about that...they aren't cheap punches, after all! They lady I spoke with was very kind, and assured me a replacement punch. Well, several weeks later two boxes appeared on my door step. How does one put a punch into two boxes you ask? Well, the answer is that they don't. I was actually sent two new punches. I don't know why...but I have decided to share the love! :)


So, one of you can be the lucky owner of this brand spankin' new, still in the package, large oval punch. Just leave me a comment below, and in a week or so, I will use random.org to choose a winner!

Good luck!